Monday, December 23, 2019

Christmas Recipe Book

I have been on a recipe book kick these last few weeks.  This book may be my favorite of all the ones I have made lately.  It is made to hold all my Christmas recipes. The items that were used on this book, may not be available for purchase as I have had most of them for years.

Here's the front of the cover.  I love how the cover turned out.  I can't wait to make more of these.


The inside and first Tab section.


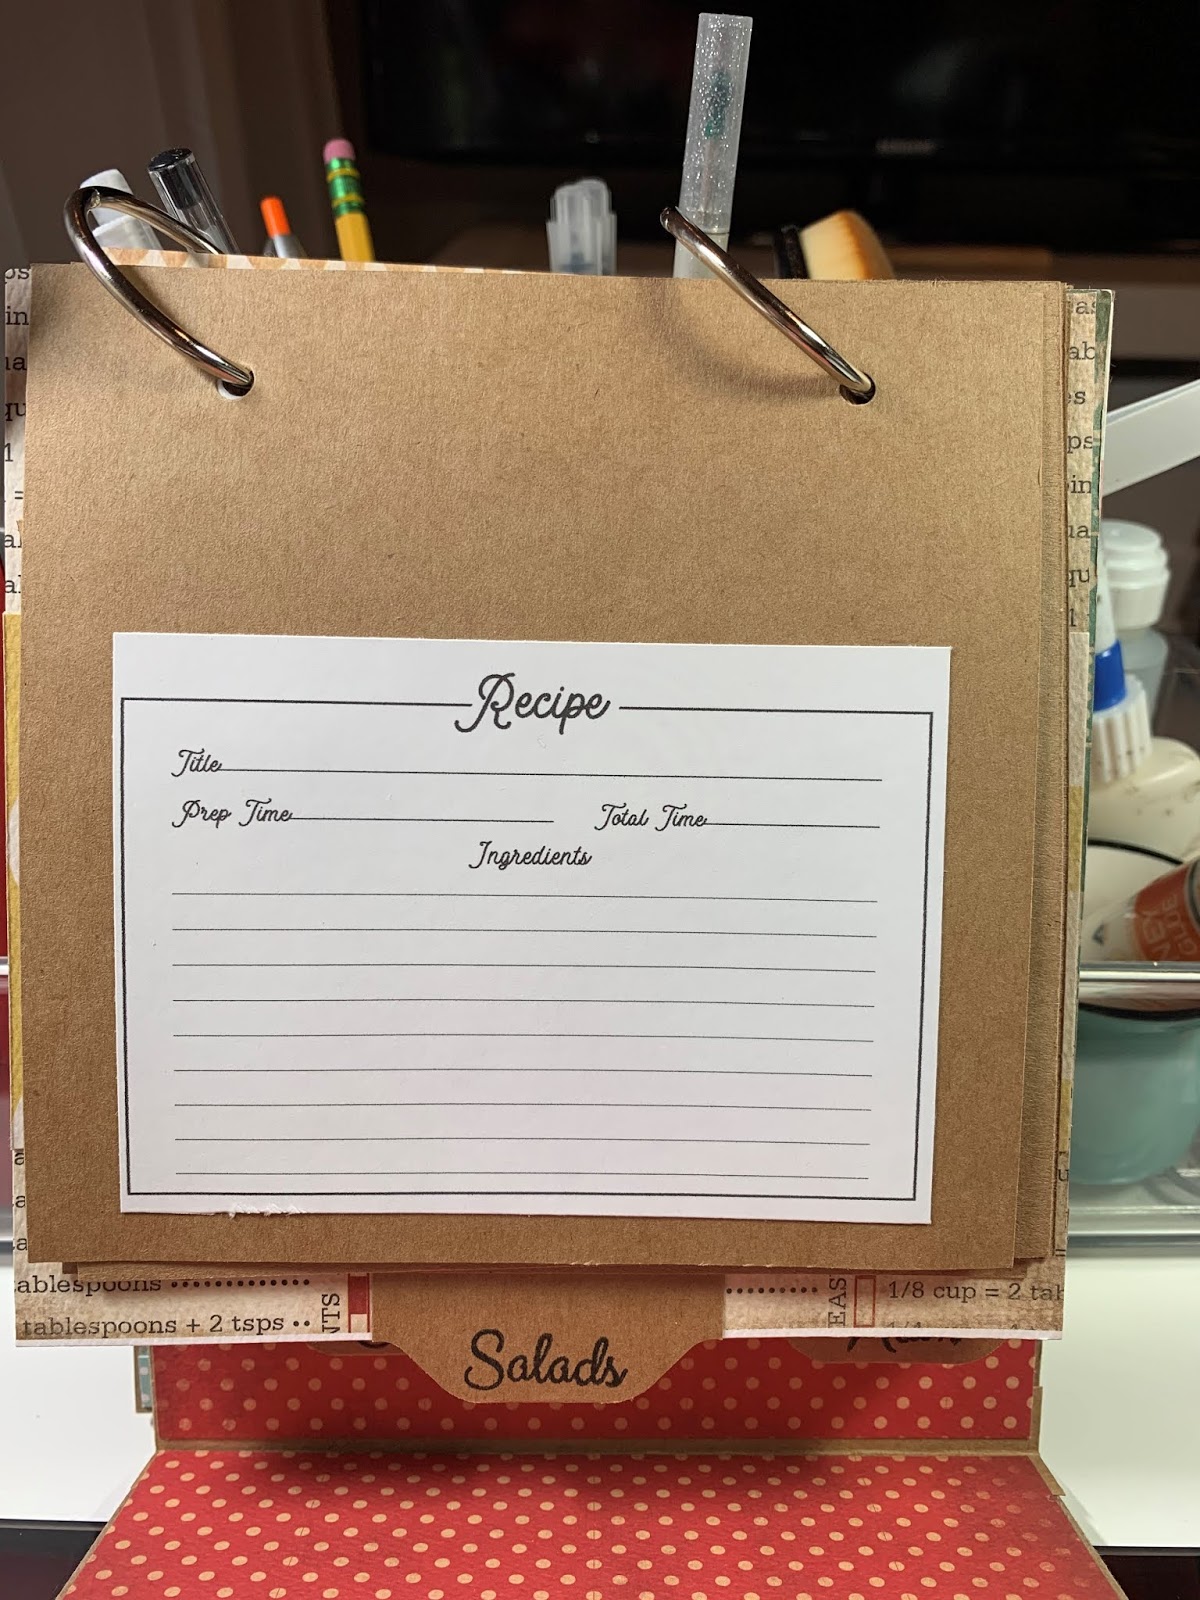
These are the blank pages to write your Christmas Recipes on and have them for a lifetime. 


Second tab section


Third tab section


Back cover.


If you noticed, I distressed the edges on all the papers which gave it that vintage look.  The paper pad that I used was a pad that I found a few years back at TJ Maxx.  I love the cars and buses.  

Supplies:

Stamps: What's Cookin' (MayMay Made It), Wonderful Words Holiday (Papertrey Ink)
Dies: MFT Scallop Rectangle
Paper: Pebbles Holly Jolly Christmas
Ink: Vintage Photo Distress Ink, Black Memento
Accessories: Crop-A-Dile Corner Chomper, Chipboard, Ribbon, Buttons, Cinch


Here is the video by MayMay Made It that I followed to create my recipe book.  

I hope you will watch the video and give it a try and let me know if you liked making this project.

Until next time, have a blessed day!!!!

Tess


Saturday, December 21, 2019

Recipe Book....

Hey everyone, I have a recipe book to show you today.  This is another fantastic video that I followed to put this recipe book together.  It's really easy to follow and fun to make.  I will have the video listed at the end of this post.  

The first picture is the cover of the book.  In the video MayMay will show you how to make everything including the apron.  Now I used different papers on mine than what was used in the video.  I think it's good to make it different plus I didn't have the paper that she used.  The book stands up and would really be cute on the kitchen counter all year long.  It has a magnet that helps keep the book together so that it can stand.


This is what it looks like from the side.  Isn't it just adorable!!!!


These are the dividers that were made for each section.  All papers are from the kit "Homemade with Love"  by Carta Bella. The stamp set with the appetizers etc. are from MayMay Made It stamp set What's Cookin'.


Here is the front of the recipe card.  MayMay has a link on her blog to download the recipe cards.


and here is the back of the recipe card.  I attached the cards to Kraft Cardstock by Paper Studio.


The next few pictures will be the remainder of the dividers.


Here is a side view of the recipe opened to the appetizer section.  It's just flipped over and the magnet closure is keeping the front together so that it will stand up on it's own and make it much easier to read the recipe card and instructions.


Supplies:

Stamps: What's Cookin' (MayMay Made It)
Ink: Black Memento
Paper: Homemade with Love Kit (Carta Bella), White Cardstock (Papertrey Ink), Kraft Cardstock (Paper Studio)
Dies: Stampin' Up Layering Circles Framelits 
Accessories: Chipboard, 1 1/2" Album Rings by Paper Studio, Twine (FSJ), Magnet, Punch Board


Until next time, have a blessed day!!

Tess

Friday, December 20, 2019

Season's Greetings......

Only 6 days until Christmas!!!!!  Who is ready?  I guess I'm as ready as I will ever be.  I pray each of you have a blessed Christmas!!

Today's card I created using the stamp set from Stampingbella called Christmas Bug.  Isn't it just the cutest stamp!!


Here's a closer pic.  I am practicing using copics.  I think it's going to be awhile before I am really good at it.  I'm happy with the end result.  


Now for the inside of this card.  I created a gift card holder.  All supplies are listed at the end.  If you have any questions regarding any of the supplies used in today's post, please shoot me a message.


Supplies:

Ink: Black (Memento)
Accessories: Copics B24, B37, R29, Y19, N2, N3, N6, G24, YG63 and B00


Hope you enjoyed my post today.  Until next time, have a blessed day!!!


Tess

Thursday, December 19, 2019

A Vintage Merry Christmas!!

I can't believe it has been over a month since my last post.   I have been working on a few projects believe it or not and I'm here to share one of them with you today.

This card is from Unity and it was fun coloring this truck with the Christmas tree in the back with a perfectly added bow to hold it in.  I have the supplies listed below.


Supplies:

Stamps: Old Traditions (Unity Stamp Company)
Ink: Black Memento
Dies:All Prettied Up Creative Cuts (Mama Elephant)
Cardstock: White 110lb. (Papertrey Ink)
Accessories: Copics, Ribbon (FSJ) and Nuvo Drops


Until next time, have a blessed day!!!

Tess

Sunday, November 3, 2019

Gift Card Holder...

Do you have people on your Christmas shopping list who is hard to buy for? How about gift cards??? When giving gift cards, it would be nice to have something pretty to put them in.  Here's the one I created for a swap I recently participated in.


I do not have my list of items written down that I used on this gift card holder.  I do know that the stamp set is in the Stampin' Up Mini Holiday Catalog.

I hope you enjoyed my card for today.

Until next time, have a blessed day!!!

Tessie

Monday, October 14, 2019

Happy Halloween...

Can you believe it's almost Halloween? I feel like this year has flown by. So many changes in the last few months.  I'm just so happy to be back into my crafting.  I still have some things to do around the house but I will get there I'm just enjoying being home and taking care of my family.

Let's get on with today's card.  I really wanted to make some Halloween cards for some family and friends and this is what I came up with.


Supplies:

Stamps: Booyah (Lawn Fawn)
Dies: Booyah (Lawn Fawn), All Prettied Up (ME) and Fish Tail (Unknown)
Embossing Folders: Stars (Pat Catan's Brand) and Stitched Clouds Background (Lawn Fawn)
Inks: Distress Inks-Crushed Olive, Fossilized Amber, Seedless Preserves, Wilted Violet, Dusty Concord and Memento Tuxedo Black
Paper: Black Cardstock (Papertrey Ink), Water Color Cardstock and White (Core'dinations)
Accessories: Rainbow Drops (FSJ), Black Licorice Silk (FSJ), Arteza watercolor pencils, Gingham Ribbon black (Stampin' Up)

I hope you enjoyed seeing my cards today.  Until next time, have a blessed day!!!!!

Tessie

Saturday, October 12, 2019

HAPPY FALL Y'ALL!!!!


I'm back from a long break.  Since my last post, which was in March I have moved to Cody, Wyoming from Portsmouth, Ohio.  Let's just say it has been an adventure to say the least.  We have spent a lot of time in Yellowstone, which I have enjoyed so much and hope to spend more next year.

Now lets get on with the card I have made.  It's a new stamp set that I recently purchased from Hello Bluebird. If you haven't checked out their site, you should really head over that way.  The stamps are so adorable and the prices are great as well.


I hope you enjoy my card today. All supplies are listed below.

Supplies:

Stamps: Pumpkin Time (Hello Bluebird)
Ink: Memento Tuxedo Black, Distress Inks- Carved Pumpkin, Spiced Marmalade, Dusty Concord, Mowed Lawn and Brushed Cordurory
Dies: Pumpkin Time (Hello Bluebird), All Prettied Up (Mama Elephant)
Accessories: Arteza Watercolor Pencils- Blood Orange, Garnet Carmine Red, Basil, Moss, Plum, Burnt Ochre, Cocoa, Black, Cinnamon, Elephant Grey, Flamingo, Indigo and Pink Macaroon, White Gelly Roll Pen and FSJ Rainbow Drops


Until next time, have a blessed day!!!!

Tessie 

Wednesday, March 20, 2019

Hi Sweet Friend....

For today's card, I am using the new die set from MFT called Inte-active Swing Die-namics and the branch that was a freebie with a purchage of $60 or more. A few sets that have been out for awhile called Beautiful Day Stamp/Die-namics and Grassy Edges Die-namics. I used distress inks to add more clouds in the background and to give the grass an little more color.  Copics were used to color in all the images.

Until next time, have a blessed day!!!

Tess
💕
💕
 

Tuesday, March 19, 2019

One Sheep, Two Sheep, Three......


Using the darling Ewe are Awesome stamp set once again.  I used the slider elements to make it look like the sheep is jumping over the cloud. I used distress ink and a cloud stencil from MFT to give it a little more clouds in the background. The stars and mini clouds are also from the stamp set and for a little dimension I added stickles.  The large white cloud is Cloud Nine creative cuts from Mama Elephant.  I used copics to color in the sheep.


Until next time, have a blessed day!!!

Tess
💕
💕

Monday, March 18, 2019

Dogwood Flower Stamp Set


Made a variety of cards using the Dogwood Flower stamp from Ink on 3. I picked this set up because it caught my eye when I was at the Simon Says Create on Friday.  I thought you can never have enough flowers.  I heat embossed the stamp with Simon Says White Embossing Powder.  I took a variety of distress inks and colored in the flower.  I stamped a Happy Birthday sentiment from Stampin' Up and the others are from Fun Stampers Journey.  A quick and easy card to have on hand for those occasions that pop up on us.


Until next time, have a blessed day!!!

Tess

💕
💕
 

Thursday, March 14, 2019

Happy Birthday

Today's card I am using the Piece of Cake stamp set from Honey Bee Stamps. We always know someone who is having a birthday and it's always good to have a card on hand. Not sure of anyone else but growing up my favorite cake was chocolate.  Now that I am getting older, I tend to lean to the white cake.  I have been practicing with the copic markers again.  It's a learning curb but I do enjoy using them.


Until next time, have a blessed day!!

Tess
💕
💕

Wednesday, March 13, 2019

Thinking of Ewe

Hi friends!!!! I hope you are enjoying your Wednesday.  I have been enjoying my week thus far.  It is Spring Break for me and I love it.  I have had some extra time to create in the Studio and spend time with the pups.  I just wish my son was on Spring Break as well.  

Is anyone going to be at the Simon Says Create 2019 in Columbus Ohio this Friday??? I didn't buy a ticket but my two besties and I will be there for the shopping and hopefully for the make and takes. If you are going to be there, please leave me a comment.  I would love to meet up with fellow crafters.

So for today's card, I will be using the stamp set from Clearly Besotted Stamps called Ewe are Awesome.  I was shopping for a really cute sheep stamp and this set was the one I really fell in love with.  This company is based in the UK but the dies are made in the United States.  They are a small business ran out of the home. 

 I used Memento Ink for stamping the images and on the sheep I used a variety of copic markers.  The die is from FSJ the window pop. I cut out using co ordinations 110# of white cardstock and the same cardstock for the base. I then used the cloud stencil from MFT to create a sky background with Distress ink salty ocean.  The mini clouds and dies are from the Magical Unicorn die-namics from MFT. I used stickles to give the clouds and sky a little dimension. On the front of the card I used the cloud from Mama Elephant called Cloud Nine creative cuts.  The sheep on the front of the card is on a little action wobble spring. Last but not least the Pull here is from Lawn Fawn Push Here stamp set.


When the tab is pulled, it opens up to show the inside of the flap.  I just love the sheep peeping up from the bottom of the card.  I think he's my favorite out of the set.

I hope you enjoyed visiting the blog today!!!

Until next time, have a blessed day!!!!

Tess
💕
💕

Tuesday, March 12, 2019

Magical Unicorns

I'm here today to share with you a card using the magical unicorns. I know I always say that I had fun creating these cards but it's true I did indeed had fun making them.  The stamp set and die-namics  is Magical Unicorns from MFT and I colored them with copics and a variety of watercolor pencils. The pattern paper is Spring Fling petite paper pack and Perfectly Paid Chill petite paper pack from Lawn Fawn. The two different clouds are from the creative cuts called Cloud Nine from Mama Elephant. I used some stickles on the mini clouds and stars and on the wing of the unicorn.  


Inside of the card:


I hope you enjoyed visiting the blog today.  Can't wait to show you my next project using some really cute sheep.

As always, Until next time have a blessed day!!!

Tess
💕
💕

Sunday, March 10, 2019

Fun Fold Card

For today's card, I have created a Fun Fold.  If you every wonder where I get these folds, just get on pinterest and search for fun folds and it will bring up some really awesome folds.  These cards are special to me in one way or another.  I love love the colors on this card. Bubble Gum card base with a little River Stone from Fun Stampers Journey. The flower is stamped in Bubble Gum ink and the Stems/leaves are stamped in Limeade Splash. This stamp set is from Spring Botanicals. Thinking of you is stamped in Black Licorice and the stamp set is called inside and out


I used the same ink colors and stamps on the inside. The Just because is from the stamp set called Everyday Script by FSJ . 


As always, I hope you enjoyed today's post.  Hope to see you visit again soon.

Until next time, have a blessed day.

Tess
💕
💕

Saturday, March 9, 2019

Non Traditional Easter Card


Hi everyone, I sure hope you are having a wonderful day.  For today's card, I made a Non Traditional Easter Card.  I went as simple as I could on this card because it didn't need a lot added to it. I did use the same colors that I used on the Double Dutch fold.  This stamp set is just so cute with the one rabbit blowing kisses to the other Rabbit friend.  I used copic markers to color the images. As in the blog post before, I have used some of the same dies.  The clouds are from Pretty Pink Posh called Rainy Days. The stitched blue background is from Mama Elephant called Cloud Nine Creative cuts. The rabbit stamp set is Happy Hoppy from Gerda Steiner Designs.


The Sentiment Happy Easter for the inside is from a retired set from Stamps of Life.

I hope you enjoyed stopping by today.  Hope to see you back soon,
Until Next time, have a blessed day!!!


Tess
💕
💕

Wednesday, March 6, 2019

Double Dutch Card


For today's card, I have made a double dutch fold.  It's a fun and different type of card to make.  We did this one for a swap on card conga.  I decided to use the Hog Heaven stamp and die-namics from MFT.  One of my favorite sets to use.  I enjoy coloring the pigs for this card.

I used copic markers to color the images.  The grass is a die from MFT called Grassy Edges Die-namics. Using a really pretty green card stock from FSJ called Kiwi Slice. The sky background is  Beach Ball. The clouds are Rainy Days from Pretty Pink Posh.


When the card is opened up, this is the inside.


I put an action wobble spring on the flying pig on the front of the card.  When you flick him, he wobbles.  I thought it was fitting for this card.


I hope you enjoyed visiting my blog today.  I hope to see you back here for my next project.

Until next time, have a blessed day!!!

Tess 
💕
💕 

Tuesday, February 26, 2019

When Pigs Fly.....


Good morning everyone!!! I sure hope you are having a wonderful start to your Tuesday.  The sun is shining here in Ohio. It may be a little cold but at least it isn't raining.  I love the cooler weather but I think I am ready for Spring. I want to see the leaves on the trees and flowers blooming.  I just want to see some pretty colors outside.

Okay on to today's card.  This card was a little challenging for me to create using the Wiper Surprise Creative Cuts from Mama Elephant.  I had to watch a video a few times to get the understanding of how it worked.  I will have to watch that video again when I make another one because understanding how it works is just so confusing to me.  The stamp set that I used is Hog Heaven from MFT with the matching die-namics .  The grass is from MFT as well which is called Grassy Edges die-namics. I used Lawn Fawn Stitched Cloud Backdrop.  The White Clouds are from Rainy Days die set by Pretty Pink Posh. I colored the pigs with copic markers and I have to say I really, really like how they turned out.  The sequins was in my stash and I would say they are probably from Pretty Pink Posh as well.

This is the before Photo: 


 ....and this is the after.  See my cute flying pig pops up.  Had so much fun creating. 


I hope you enjoyed visiting my blog today.  I can't wait to show you my next project using these cute pigs.

Until next time, have a blessed day!!!!


Tess 
💕
💕 

Thursday, February 21, 2019

Dictionary Background Card

For today's card, I used a page from a dictionary.  I think the dictionary I used was one my husband had for many years.  The pages started to turn a yellow color.  Like I have said before, if you like to make cards and do not know what to do with all of them, you should join Card Conga on Facebook.  There are different swaps that happen twice a month.  It's a good way to get your work out there and make new friends.

I decided on my card to use a cake stamped image to color.  I wanted the page to have the word cake on it as well.  I used Bubble Gum ink and distressed the outside of the dictionary page. I think it adds a little pop to the page. I used a variety of Spectrum Noir markers to color the cake. The clay hearts are from Honey Bee Stamps.  I wanted to add a little dimension to the page. I used Chocolate Chip card stock for the base of the card. Bubble Gum card stock to attach the dictionary page to.  I took the Bubble Gum ink and shaded in the work cake on the page.  I think over all the card turned out simple but cute.


I used for the inside of the card Bubble Gum Cardstock with the stamp Happy birthday in Black Licorice with more of the mini clay hearts from Honey Bee Stamps.


I hope you have enjoyed visiting today's post.  I hope to see you here again soon.

Until next time, have a blessed day!!!

Tess 
💕
💕 

Wednesday, February 20, 2019

Two Cards Birthday and A Spinner Card All In One and A Photo Bomber

When you work at a University, we employ a lot of students.  Of course we have to celebrate their birthdays with a card if nothing else.  Good way to get your work out there as well.  Never know who may need a card at the last minute. We do have a couple of Birthdays to celebrate this Month.  I made two cards and I had to watch videos on how to put these together. 

For the first card is the washing machine from Lawn Fawn Loads of Fun Stamp and Die set and the Reveal Wheel  .  If you turn the wheel on the left hand side, the clothes inside the washer will go round and around.


Inside of card is stamped with a birthday stamp from Stampin' Up.  Not sure if it's available any longer.  Some bubbles from the Loads of Fun stamp and die set from Lawn Fawn.


For the second card, is the Photo Bomb card that I made from watching a video. I will list both videos on how to make both cards at the bottom of this post. The Dog's Woof stamp and the creative cuts are from Mama Elephant. They have some of the cutest stamp sets. The Polaroid frame is Lawn Fawn and the Celebrate die is Simon Says Stamps

I tried to use the same colors for the background but I have to say it didn't turn out exactly life hers.  I am happy with the outcome of this card.  I am going to try it again soon with another stamp set I have.


Here is the little photo bomber.  I swear this card is just too adorable.


As promised, here are the videos on how to make the interactive cards.


 Hope you enjoyed today's visit. 

As always, until next time have a blessed day!!!

Tess 
💕
💕